How to Use GIMP AI Assistant 1.3

Download GIMP AI Assistant 1.2 for Free
▶ “Subscribe to the D&D Channel on YouTube to unlock the download!”
Note: Download may take some time during periods of high traffic.
>>More1.3
Downloads>GIMP AIAssistant1.3
(270.63MB) Windows Version
📄 What Makes It Mind-Blowing!5 Core Power Features
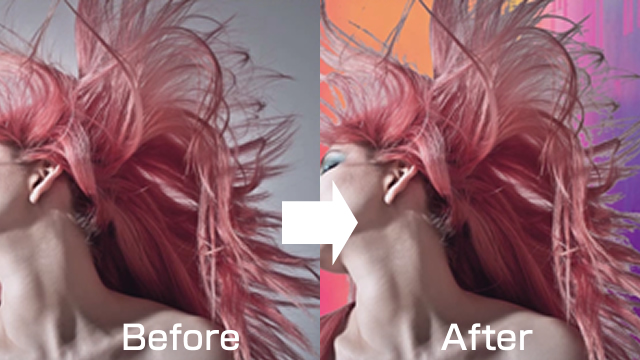
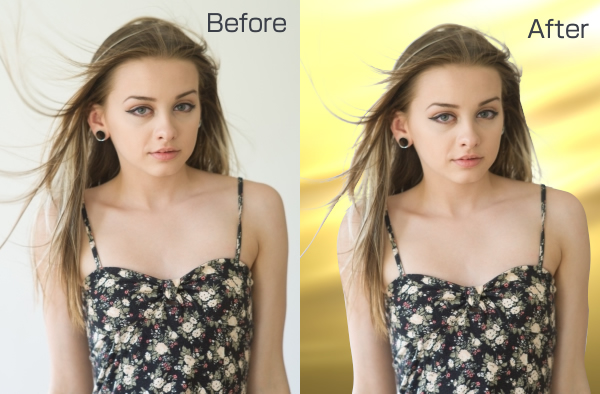
✨ 1. AI Background Automatic Cutting (AI背景自動切抜き)
Isolate any subject instantly. Remove backgrounds from portraits, products, or complex objects with a single click. The intelligent engine automatically identifies foreground subjects even with intricate backdrops, instantly porting the masked result directly back into GIMP layers.
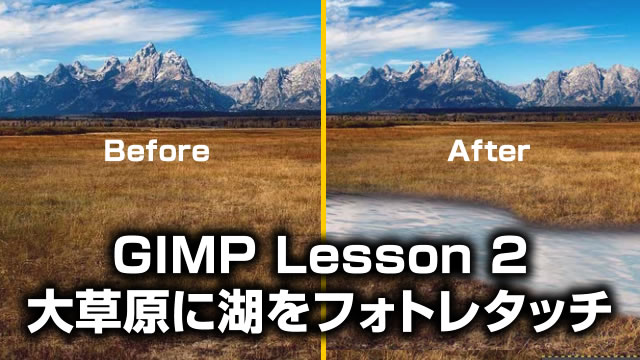
🧹 2. Natural Smart Erase / Inpainting (余計なものを消す・ナチュラルに削除)
Magically wipe away unwanted objects. Use it just like a healing brush. Simply highlight what you want removed, and the AI samples the surrounding texture to blend it seamlessly, leaving no trace. Click “Final Adjustment” (最終調整) to apply a smooth native mask.
⚡ 3. Automated Mass Batch Processing (大量一括バッチ処理)
Process hundreds of images while you rest. Turn on “Auto Batch Processing” (自動バッチ処理) to run your checked pipeline across an entire folder. The AI assistant will automatically execute Background Cutting, Scenery Enhancement, Portrait Sharpening, and Auto White Balance on all files consecutively.
🎨 4. REMOTE CANVAS – Browser-Based Sketch Tool (リモートキャンバス)
Zero installation required! A lightweight, highly fluid web canvas that turns your browser into an illustration engine. Perfect for quick mockups, student learning, or asset creation.
- Instant Clipboard Share: Click “Copy as PNG” to instantly store your graphics on your clipboard, ready to paste (Ctrl+V) directly into GIMP, PowerPoint, Word, or Teams.
- Intuitive UI: Easy-to-use layers, shape lock features, and responsive brushes suitable for creators of all ages.
- Tip: Keep your browser zoom at 100% for perfectly aligned bucket fills!
🎙️ 5. AI Lip-Sync Animation Engine (自動リップシンク)
Bring your characters to life with voice files. Load an audio track, and the AI calculates sound frequencies down to 0.1-second steps to generate mouth configurations (open/mid/closed) and body movements (body1-4) automatically.
- Direct GIMP Sync: Outputs results straight into sequential GIMP animation layers.
- Video Editor Ready: Simply drop the exported animated GIF into your timeline, and it synchronizes perfectly with your voice track. No manual framing needed.
⚡ Quick 2-Step Start
- Click [Server Start] in GIMP.
- Launch the AI (Double-click main.exe). That’s it! The ultimate AI assistant is ready to support your GIMP workflow.

⚠️ Please Read First (Important)
- Initial Setup Time: The first “AI Cutout” will take longer as the system automatically deploys AI data to the correct location on your PC. Depending on your specs, this may take 1–2 minutes. It will be lightning-fast from the second time onwards.
- Security Alerts: When launching main.exe, Windows Defender or other antivirus software may show a warning. Please click “More Info” and select “Run Anyway.”
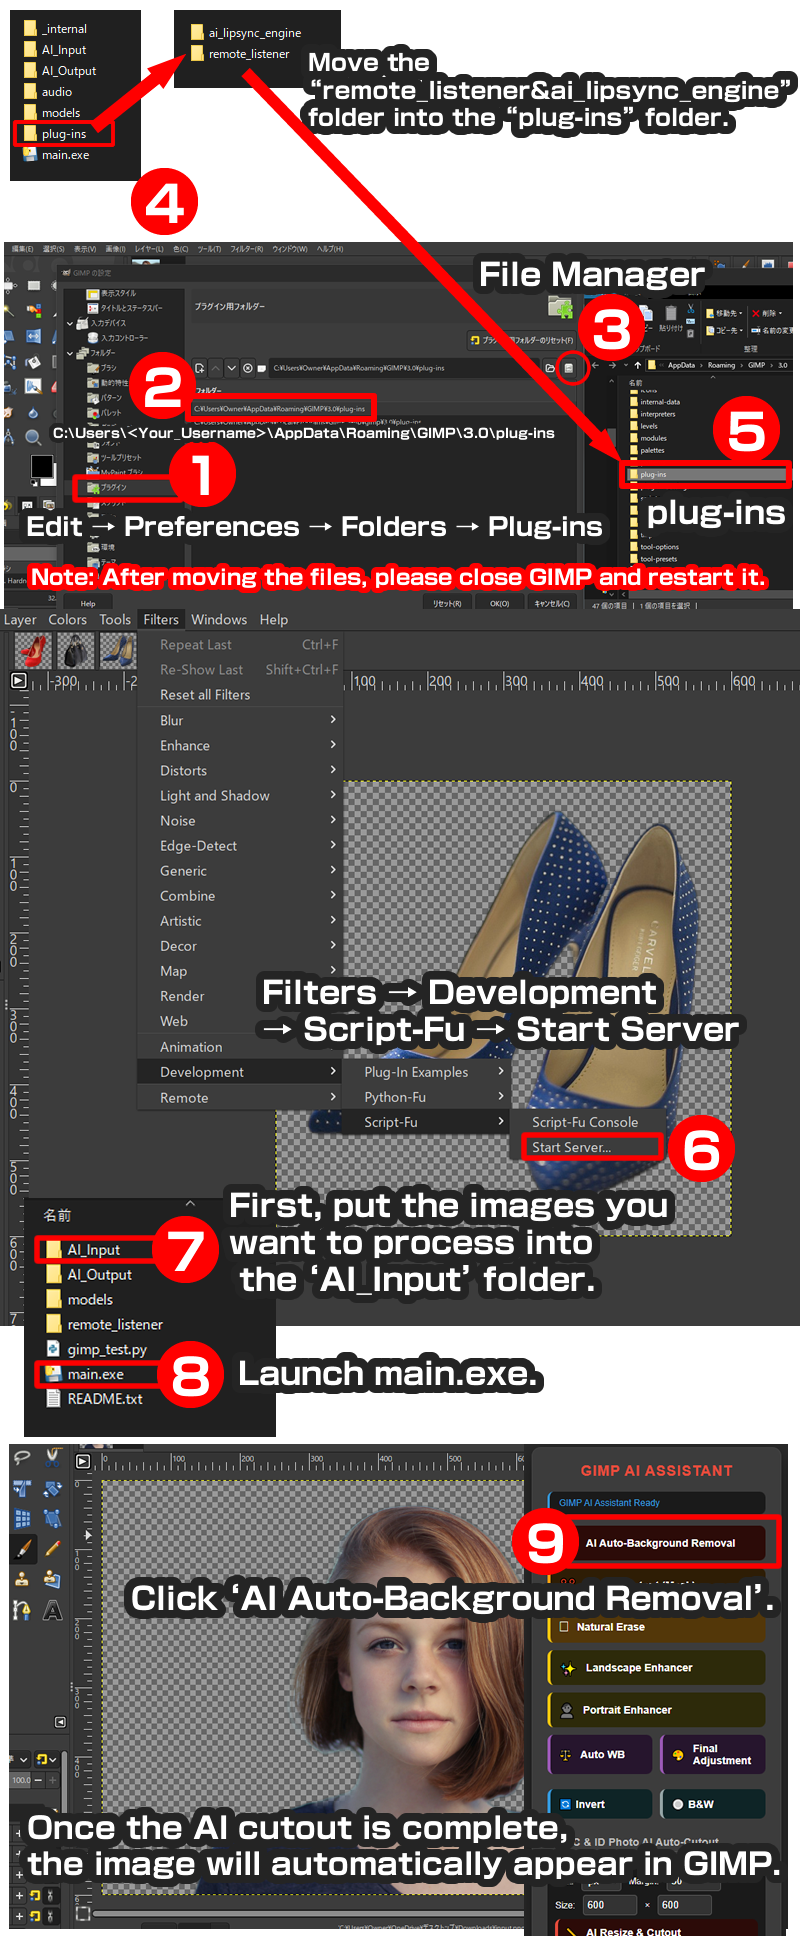
- GIMP Connection (Required every session): To allow GIMP to receive commands, perform the following every time you start GIMP:
- Go to the menu: Filters → Development → Script-Fu → Click [Server Start].
- Ensure the Port Number is 10008 and click “OK.”
1️⃣ Step 1: Place GIMP Plug-in Folders (First Time Only)
Move the following two folders from the downloaded pack into your GIMP plugins directory:
- Folders to copy:
ai_lipsync_engineandremote_listener - Windows Target Path:
C:\Users\<Your_Username>\AppData\Roaming\GIMP\3.0\plug-ins\
*Note: Restart GIMP completely after moving the folders.
2️⃣ Step 2: Folder Structure Reference
Keep the downloaded folder layout intact without shifting core files:
GIMP AI ASSISTANT1.3/
├─AI_Input          <-- Place raw images here
├─AI_Output         <-- Processed files save here automatically
├─ main.exe         <-- Double-click to boot the local AI server
├─ models/
├─ plug-ins/
│   ├─ ai_lipsync_engine
│   └─ remote_listener
├─ audio/           <-- Store lip-sync voice clips here
└─ internal/
3️⃣ Usage Steps
- Launch GIMP. Every session, trigger the native server: Go to GIMP Menu -> Filters -> Development -> Script-Fu -> [Start Server]. Confirm Port is
10008and click OK. - Double-click and launch
main.exe. - Drop your images into the
AI_Inputfolder. - Interact using the local browser dashboard interface to activate cutting, erasing, or automated batch workflows!
4️⃣ Troubleshooting
- “AI_Input is empty” Error: Ensure that image files (.jpg or .png) are inside the AI_Input folder.
- No response when clicking buttons: Check if main.exe is running and if you have initiated “Server Start” in GIMP.
- PC Performance: Your PC may slow down momentarily during AI processing, but it will return to normal once finished.
⚠️ Disclaimer
Use and download of this software (Web App) are at your own risk. The developer assumes no responsibility for any damages or issues resulting from the use of this tool. Redistribution of downloaded files, modification of source code, transfer, or sale (including secondary use) is strictly prohibited.
Copyright © D&D Channel All Rights Reserved.